
Hosted connection flow
The hosted flow is where a person brings in context, connects apps, and approves your agent. People can also connect an agent directly over MCP.
The rule. A person new to Configure first sees your app's logo next to Configure's, and then an import. The person brings in an assistant's memories or connects an app, and only then verifies a phone number. It does not ask for a mailbox unless you require one.
Configure sets this order. You do not set anything to get it.
An import is a copy of what the assistant knew at that moment. Ongoing updates come from the connected agent or its integration.
The screens
- Trust. Your logo and Configure's, side by side, over "Remy uses Configure to connect your agents, apps, and chats". Your app's name is in the title. Below it are the marks of the assistants and apps the person can bring, and two lines: Configure brings in what their assistants and apps know about them, and your app sees only what they approve. They tap Continue, or Sign in if they already have a Configure account. A person who already has an account on this device, or who already brought something in, skips it. So does a reconnect link, and a link for one of Configure's own agents. A link that requires a mailbox opens on the mailbox page instead. The logo is the one you set in the Configure dashboard. Without one, it is the icon of your app's site as Configure first saw it: the origin of a browser request from your page, your MCP client's
websiteUrl, the return URL of a link you minted, or theredirect_uriyour OAuth client sends to/oauth/authorize. With none of these, the screen shows your app name's first letter. - Import. "Choose what to bring to Remy", with your logo next to Configure's in the header. Cards for ChatGPT, Claude, Gemini and Grok. The apps Gmail, Google Calendar, Google Drive, Notion and Outlook sit under Also connect your apps, by default. That list starts open, and the person can close it. Continue stays off until the person imports from one assistant or connects one app.
- Phone number. "Verify your phone number."
- Code. "Enter the code": six digits, sent by text message. Entering it saves what the person brought in to the Configure account behind that number.
- Receipt. "You're all set", with a row for each assistant imported and app connected, and one button back to where the person came from. It returns on its own after a few seconds when it can.
There is no permissions screen between them. Finishing the flow approves your agent.
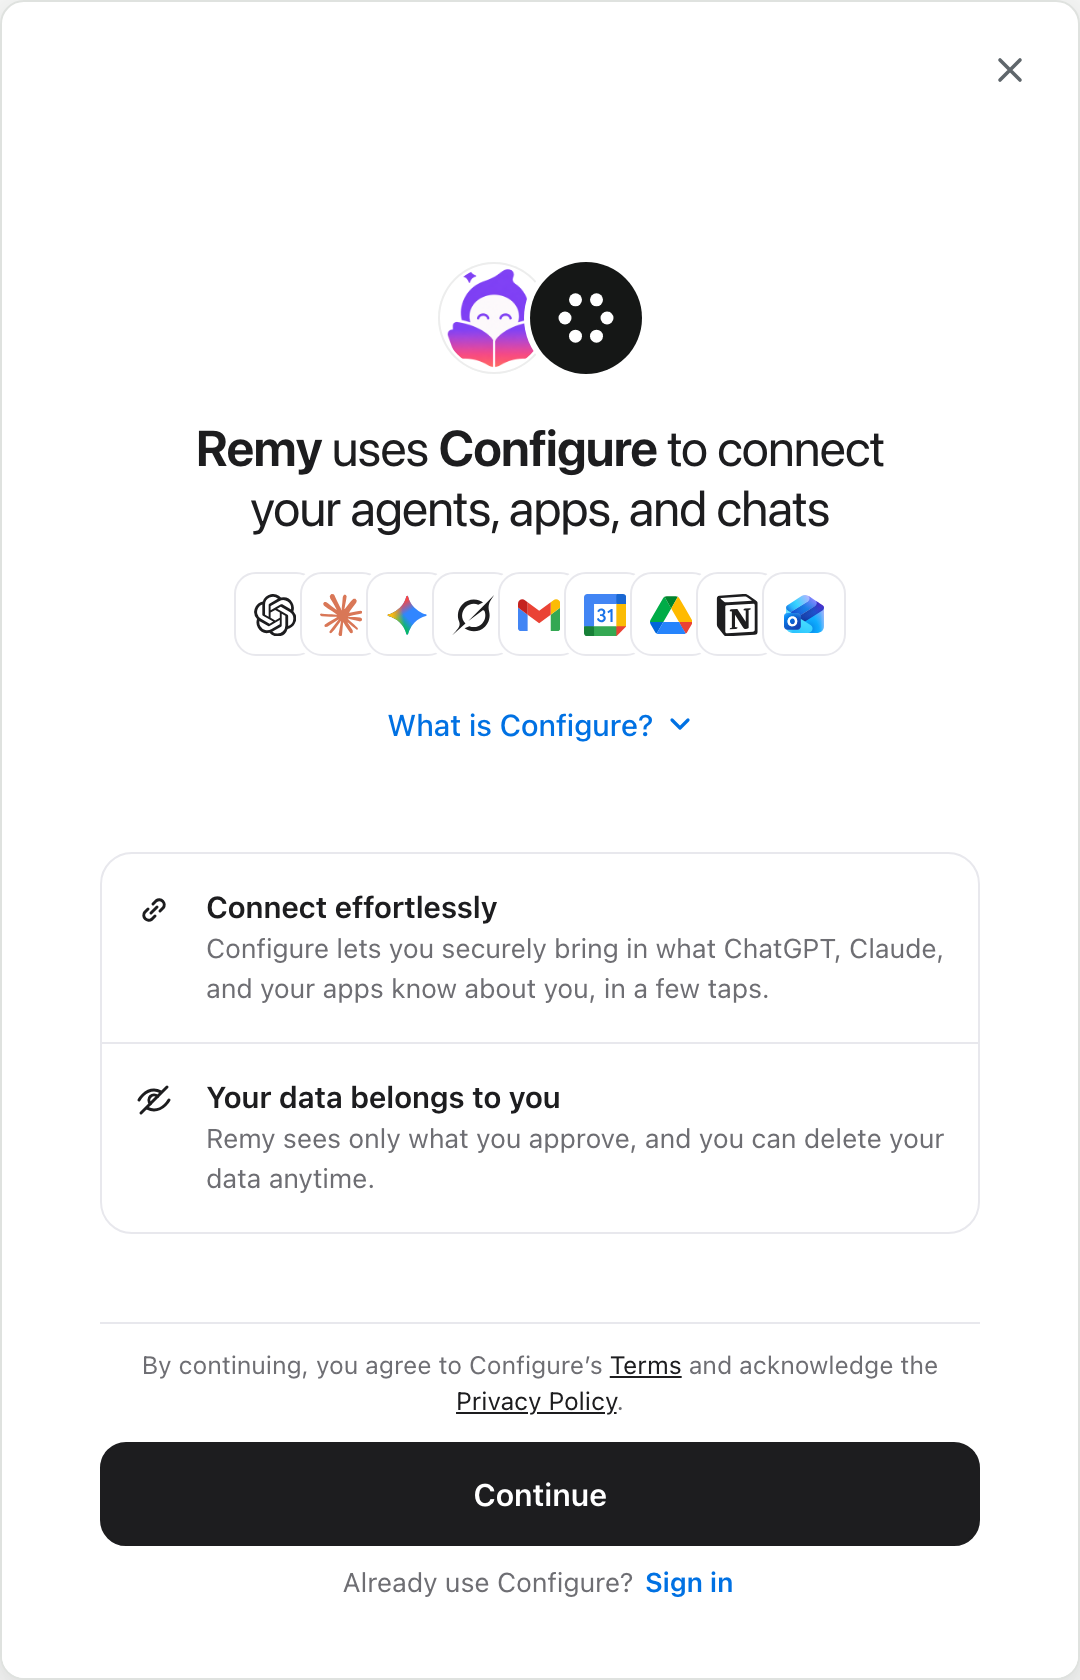
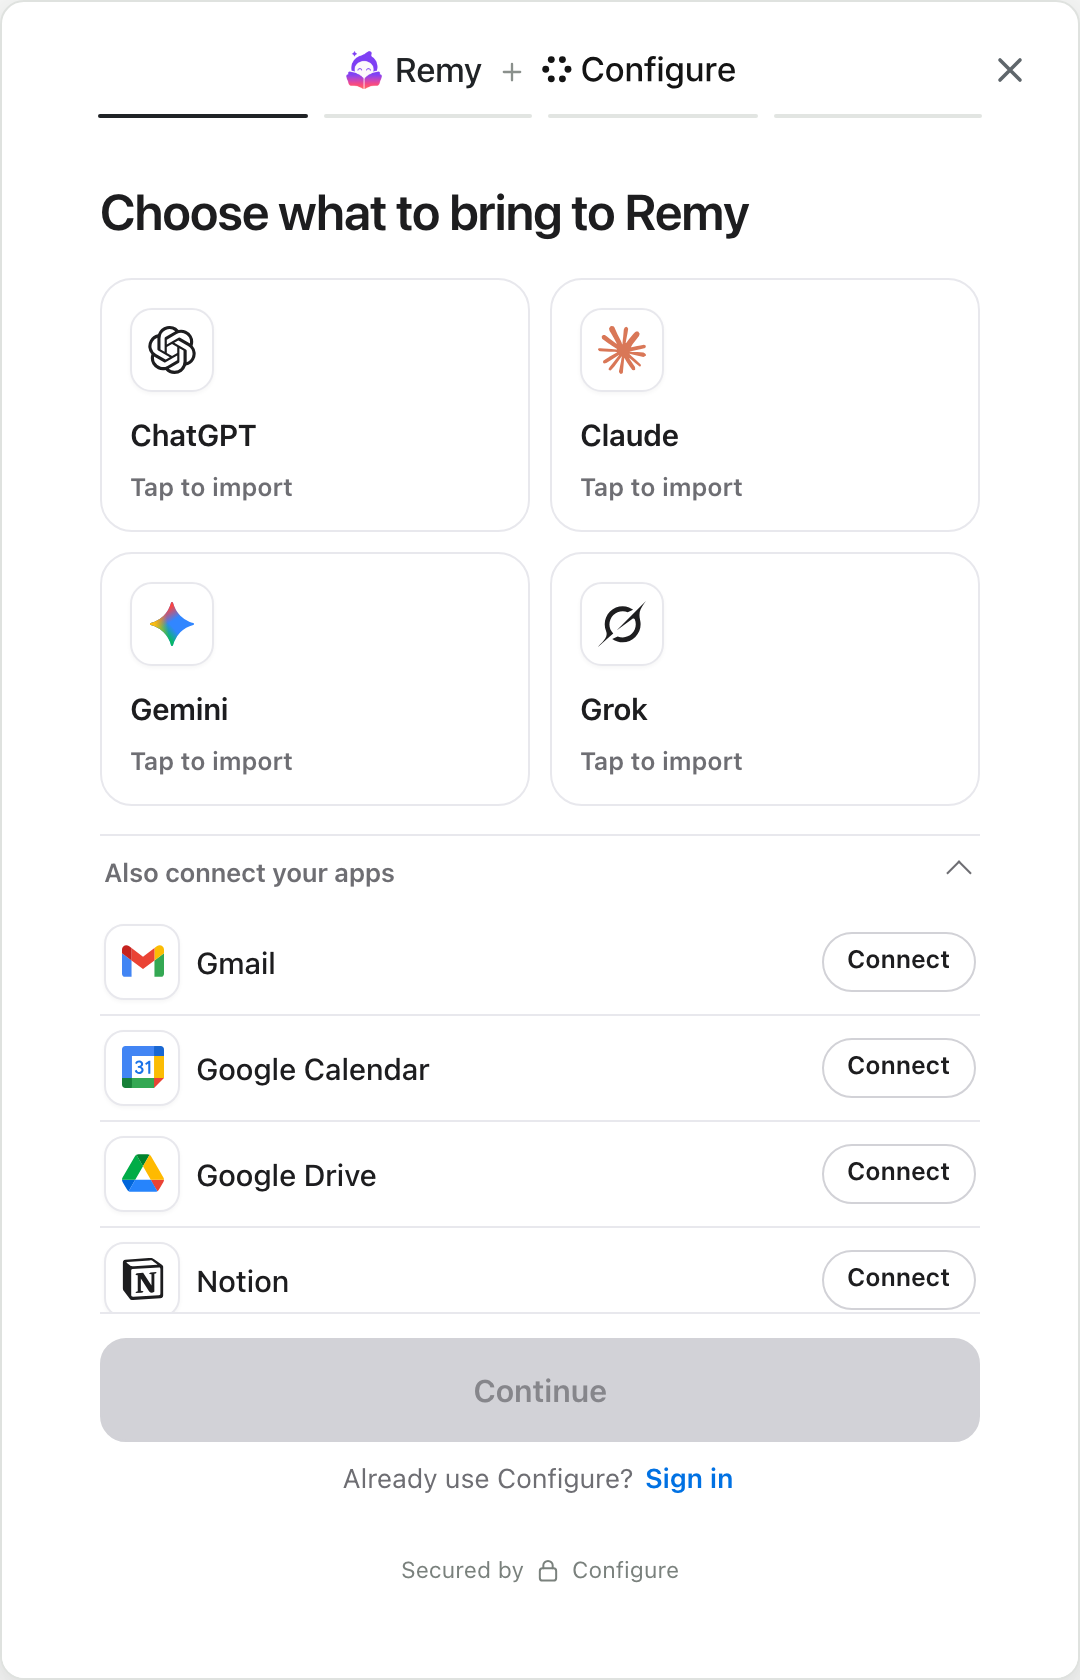
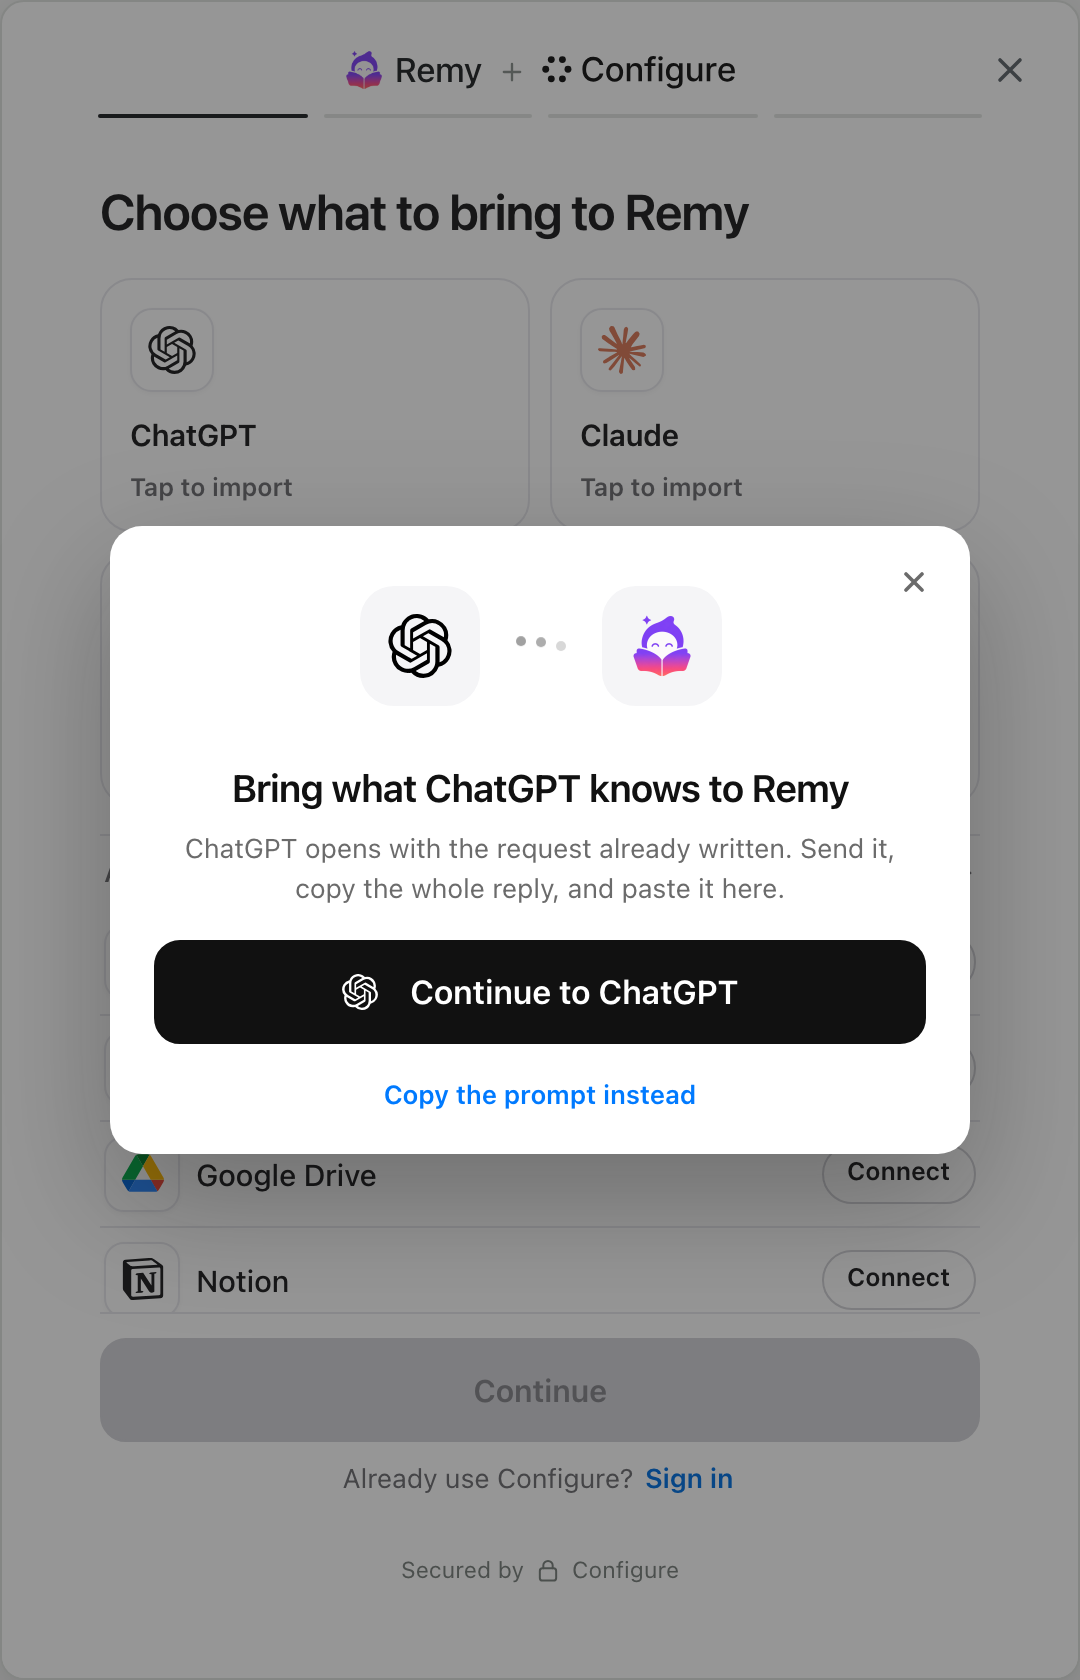
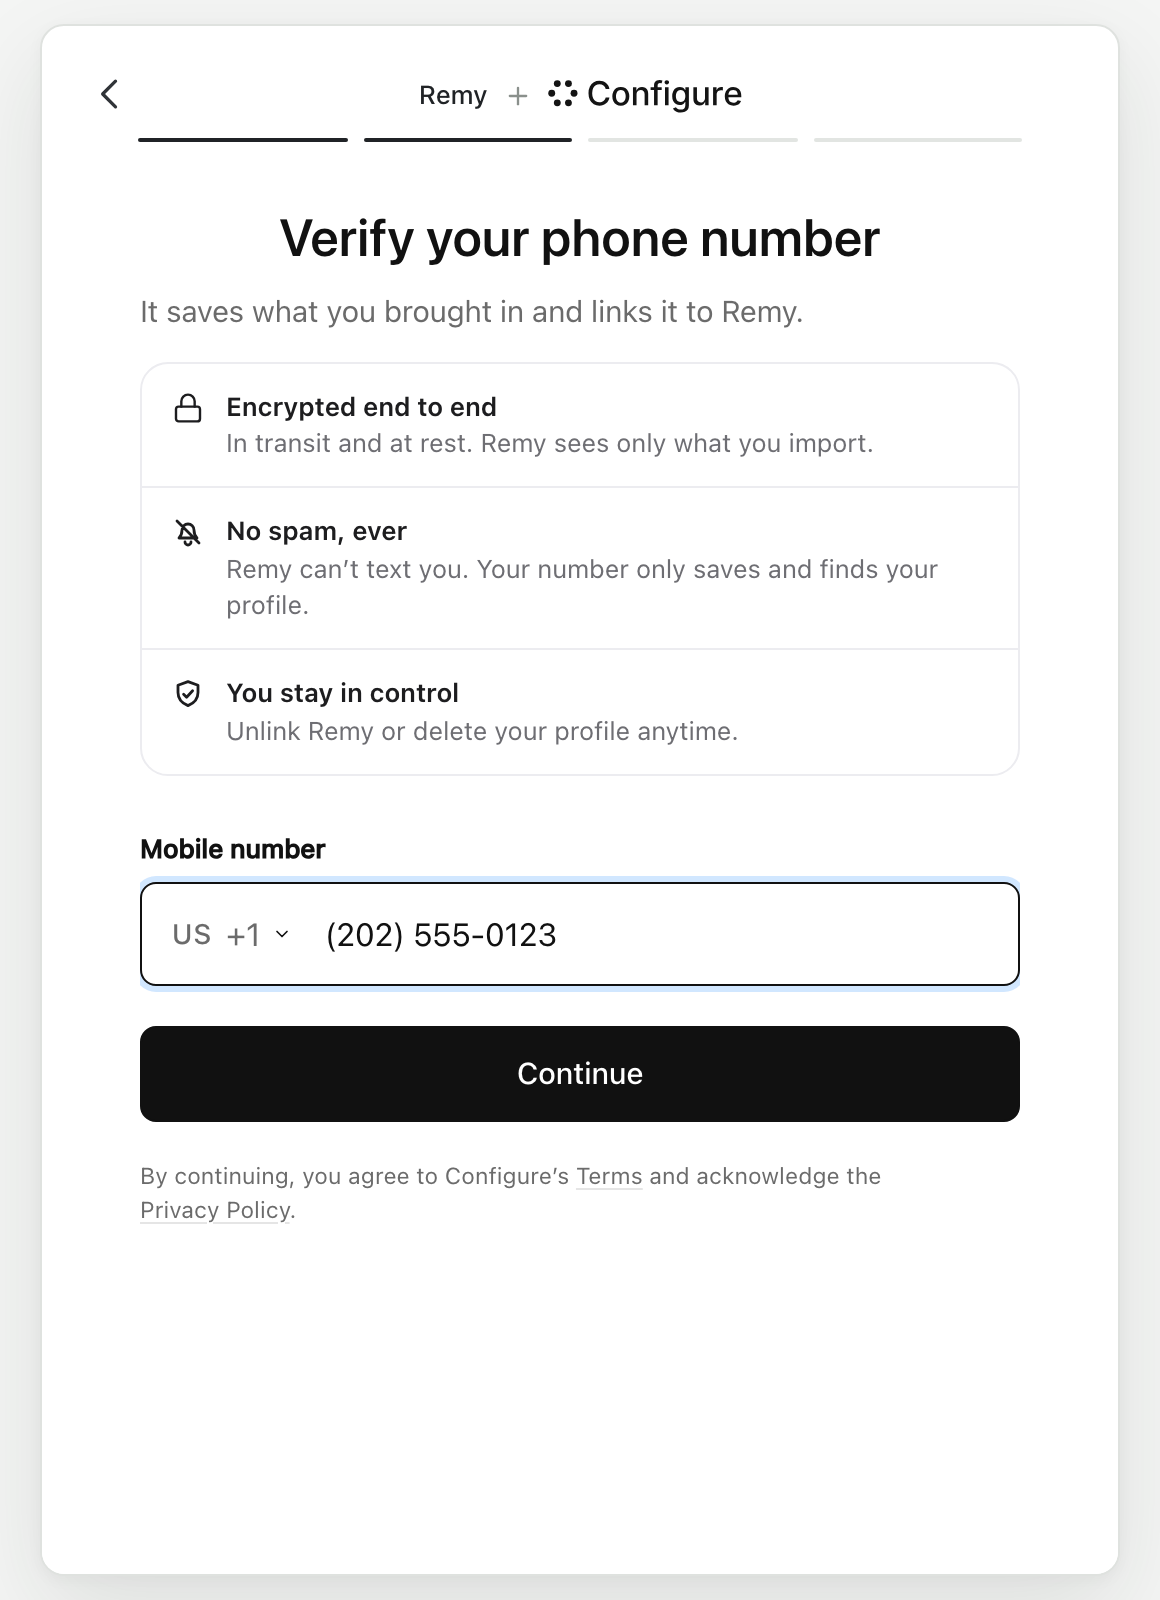
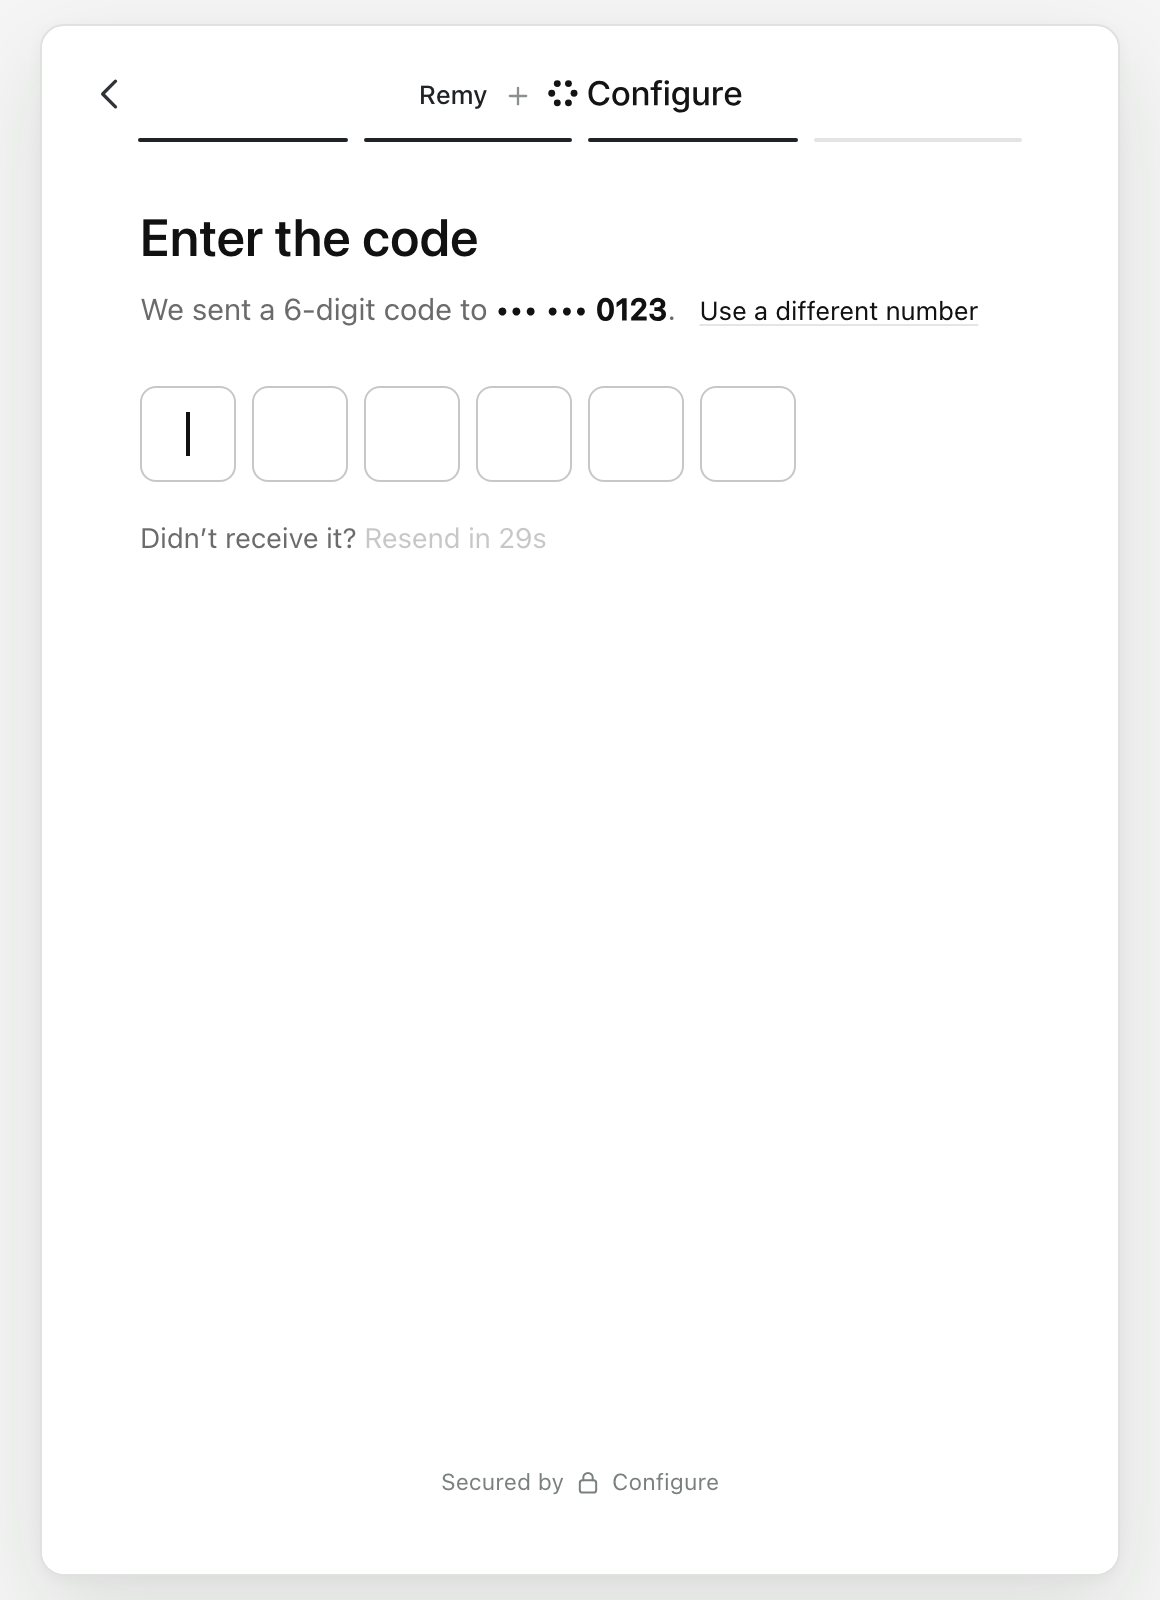
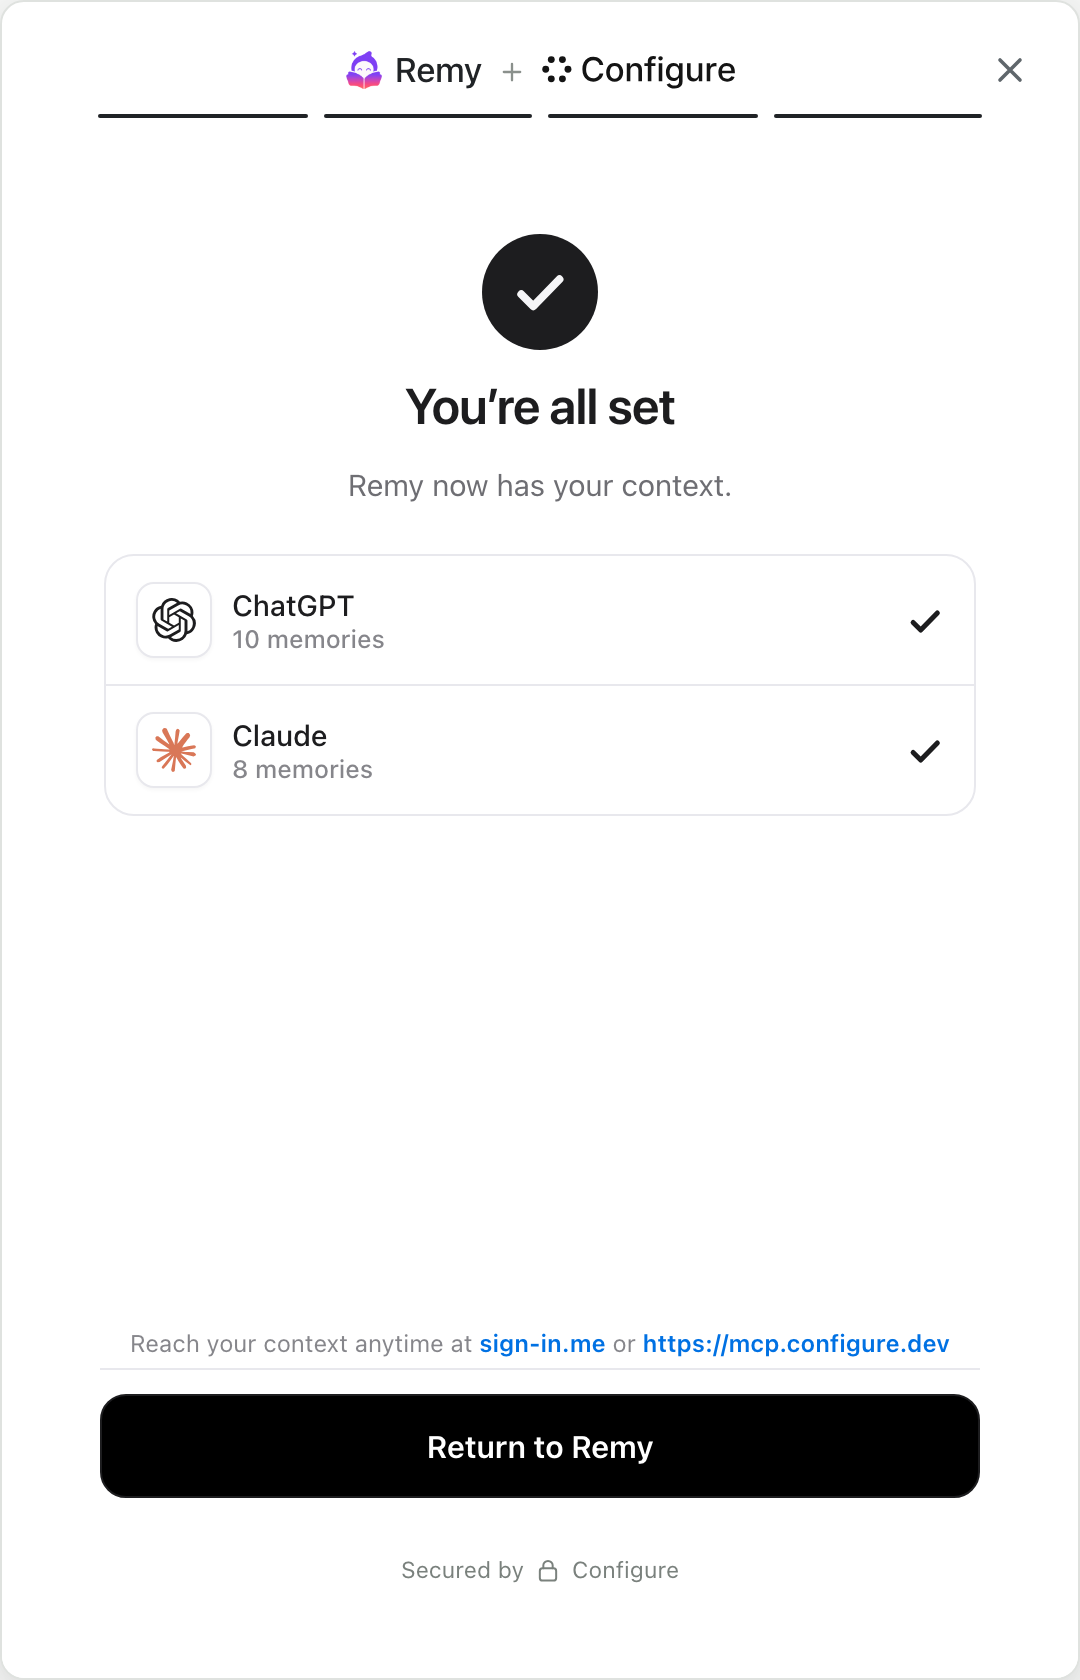
On a phone the same screens fill the width:
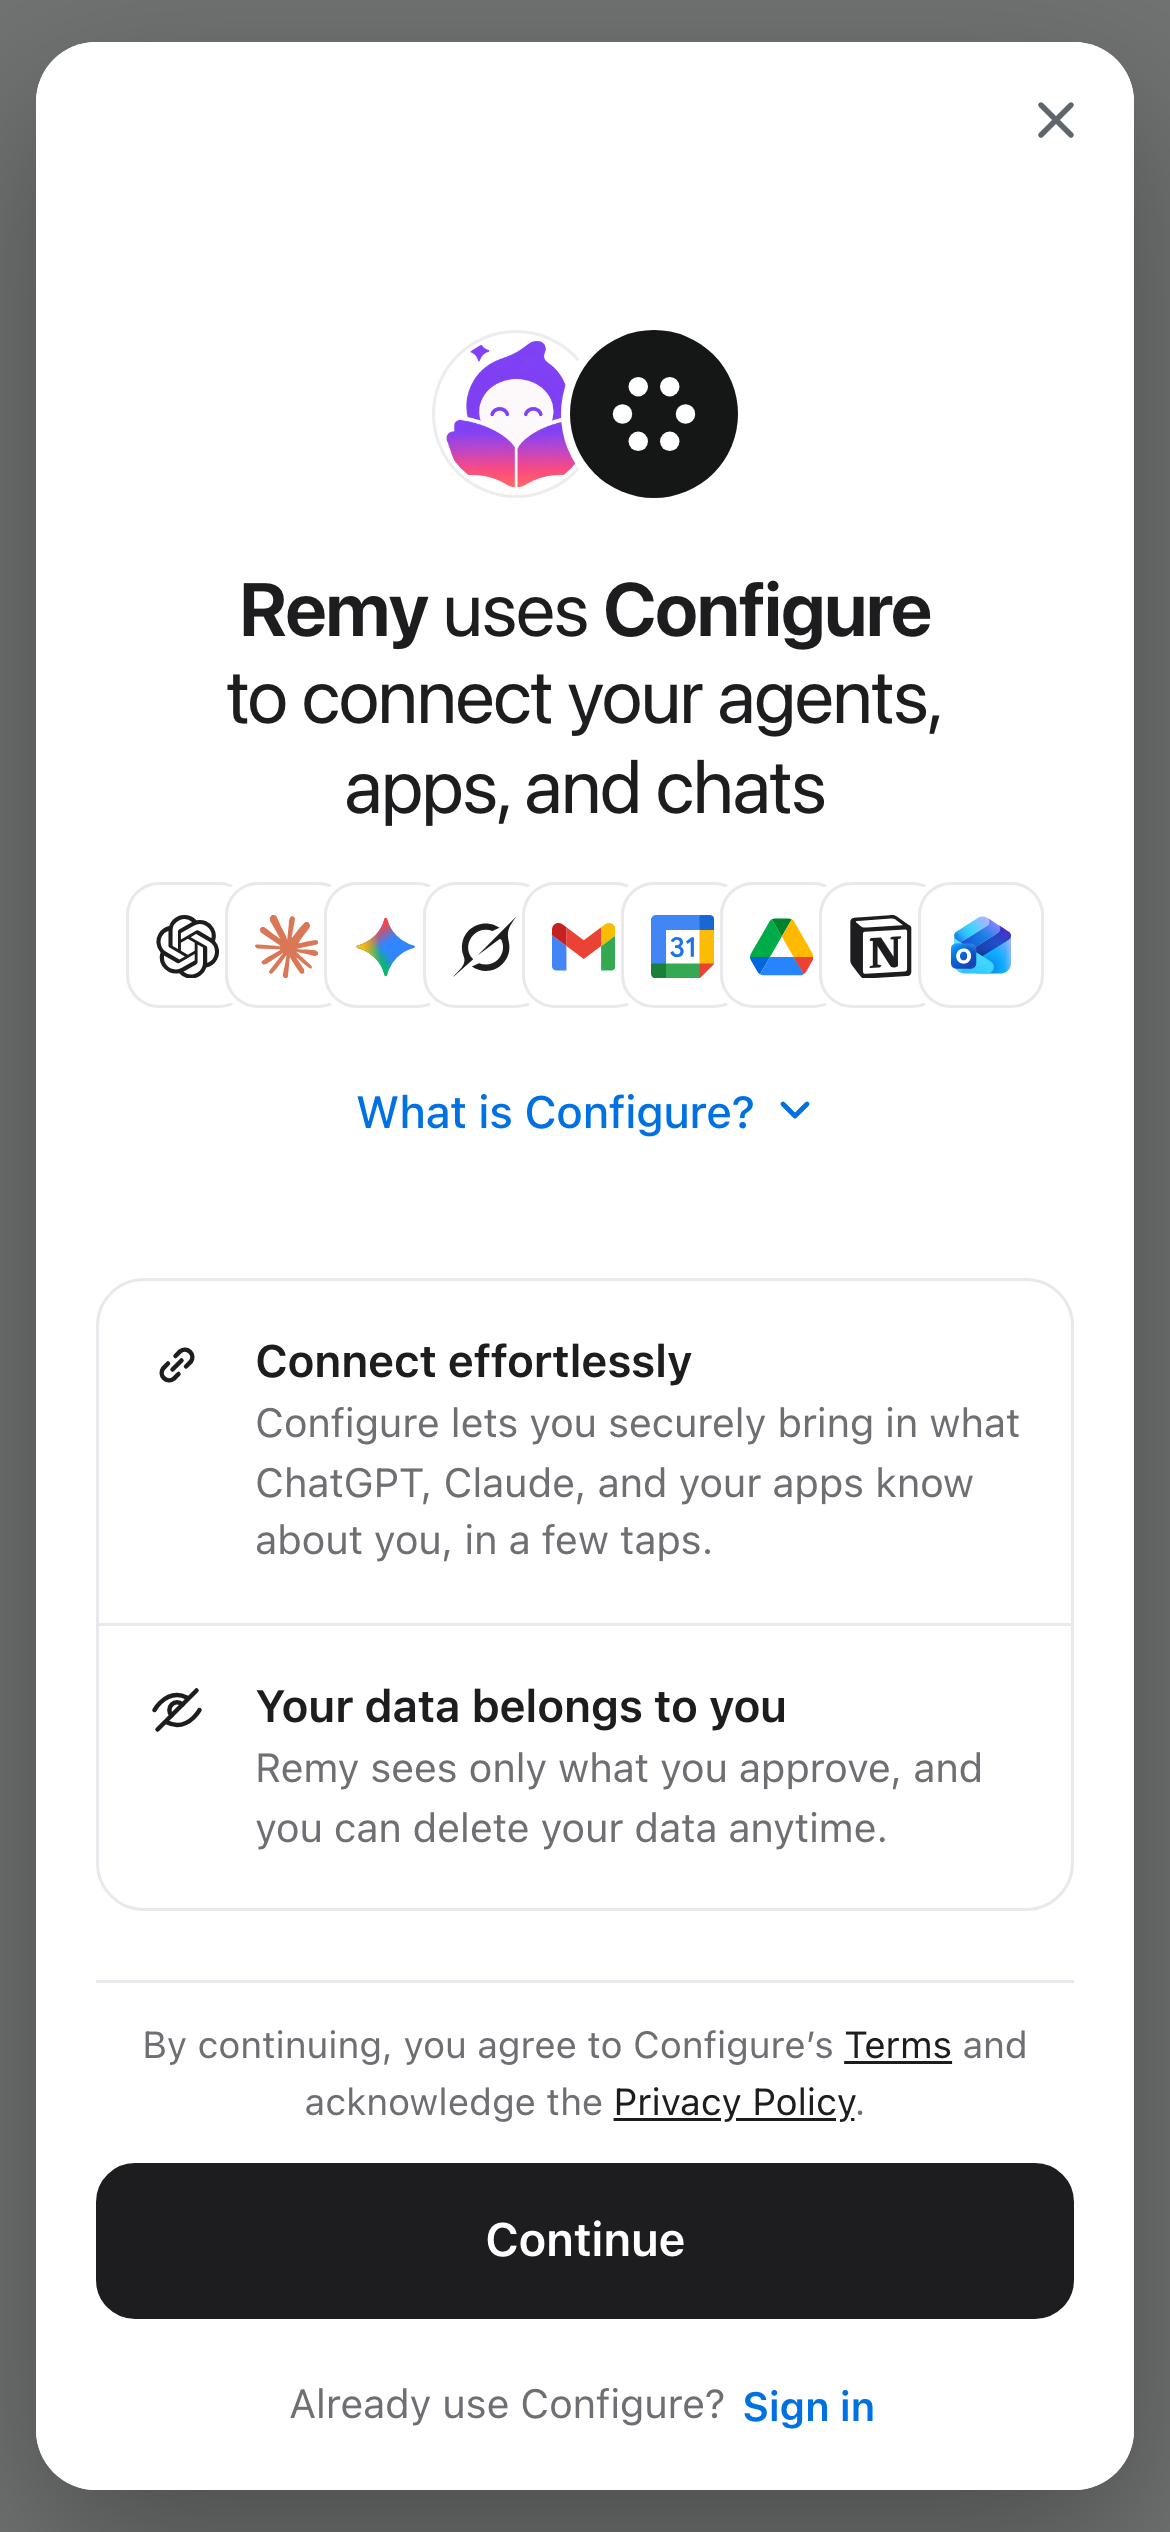
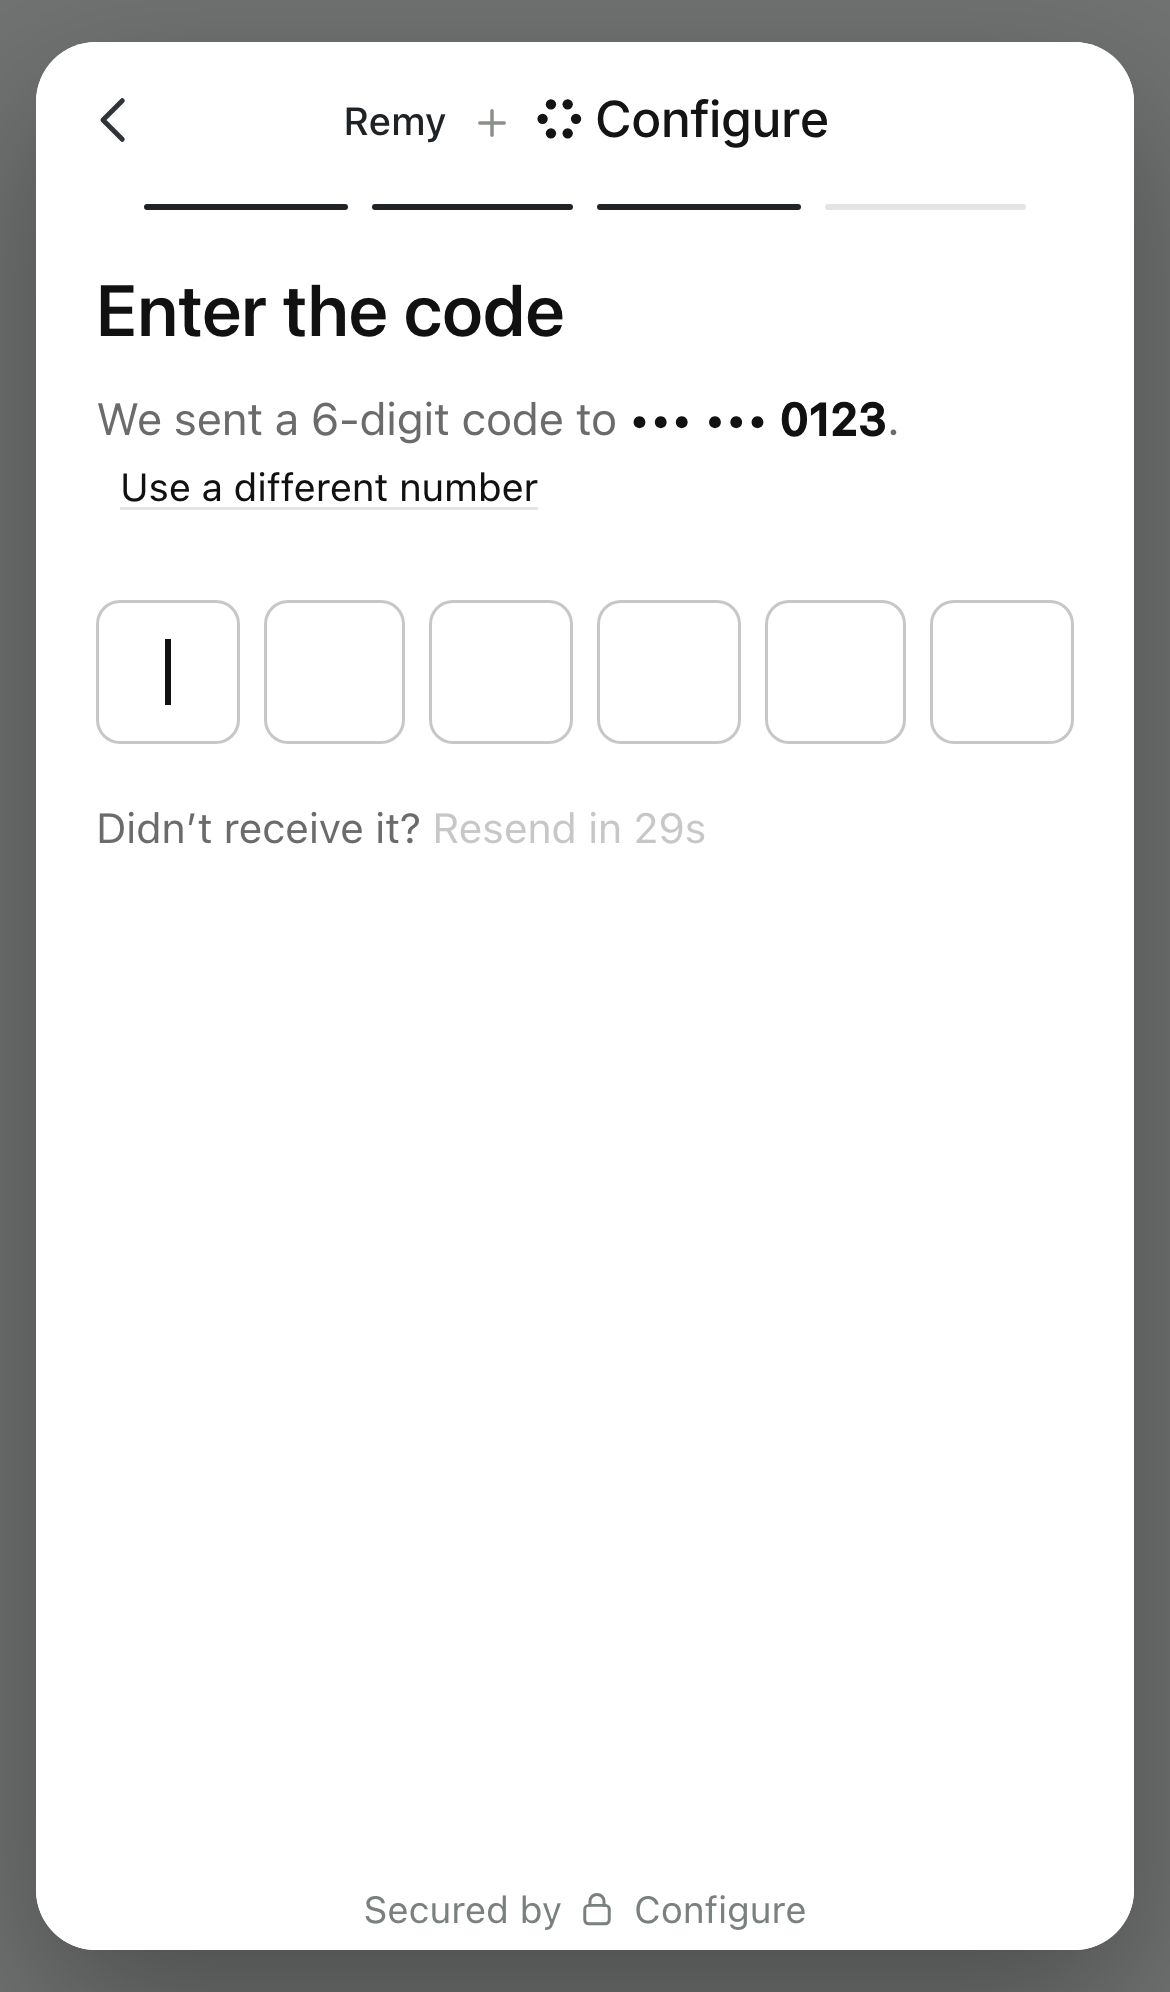
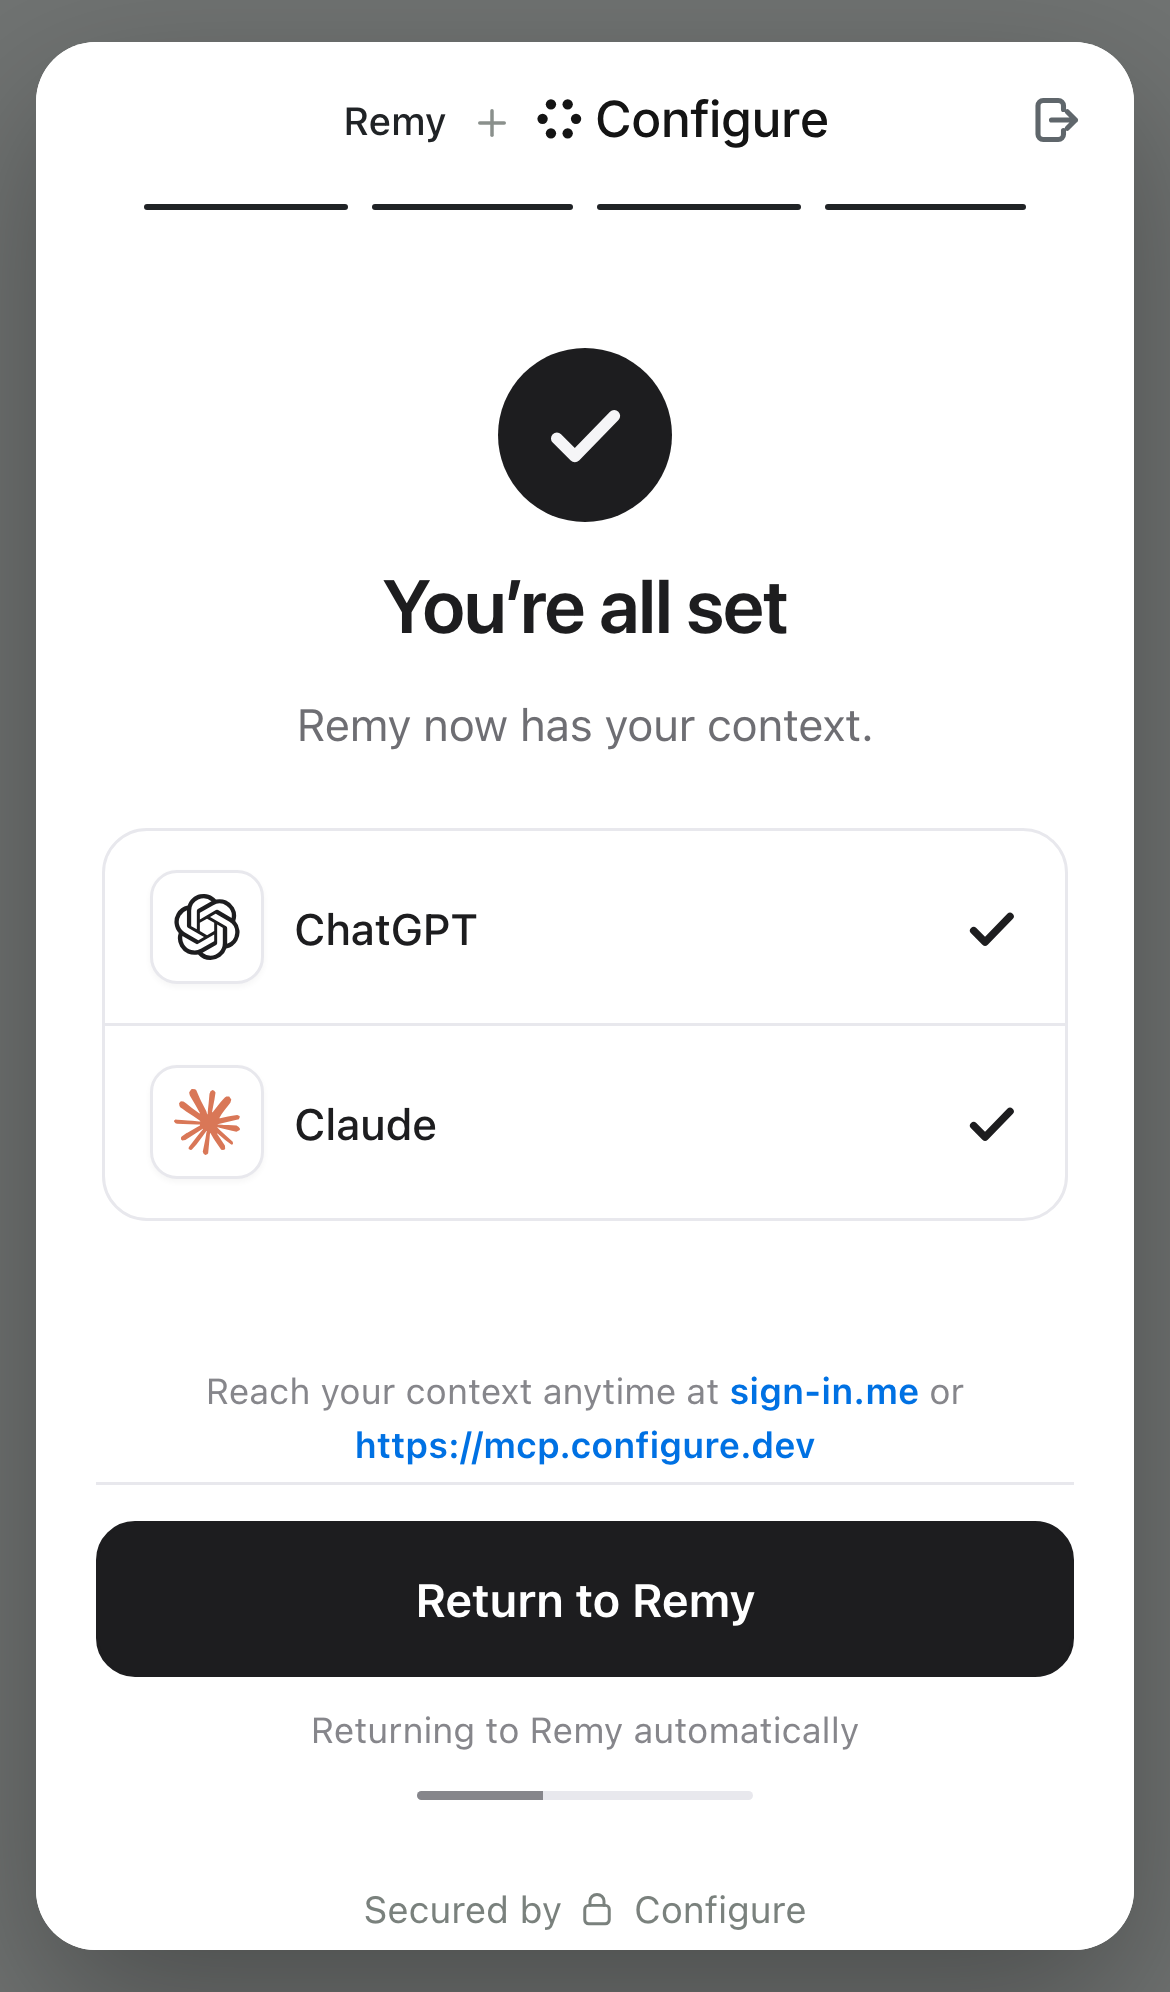
The hosted pages are light in every theme.
Languages. The screens are in English. When the person's browser translates the page, as Chrome's Translate does, every screen, the import dialog included, switches to Configure's own Spanish, Portuguese, French, German, Italian or Arabic. Arabic reads right to left. Product names, your app's included, stay as they are written.
A person who already has a Configure account taps Sign in under Continue ("Already use Configure? Sign in"), on the trust screen or the import screen. They enter their phone number and code first, then return to the import screen signed in, with what their account already holds. If the account already holds something, Continue is on unless you require more.
Where each way in starts
signInUrl, signInWithPopup, createMessageSignInUrl and profile.connect() come from the configure package, set up on your server as in the Quickstart:
ts
import { Configure } from "configure";
const configure = new Configure({ apiKey: process.env.CONFIGURE_API_KEY, agent: process.env.CONFIGURE_AGENT });| The person arrives from | First screen |
|---|---|
A sign-in link from signInUrl (sign-in.me), or Configure.signInWithPopup() | Trust, then import |
A text-back sign-in link from createMessageSignInUrl() with reason: "signin" | Trust, then import |
An OpenID Connect sign-in, including one that asks for the email scope | Trust, then import |
An MCP client connecting to Configure through /oauth/authorize | Import |
The personal MCP install (npx -y @configure-ai/mcp login --personal) | Import |
A connect link from profile.connect() that names no app, for a person who is not signed in yet and has not approved your app before | Trust, then import |
A connect link from configure_connect in a chat that names no app, for a person who is not signed in yet | Trust, then import |
| Configure's own profile sign-up | Import |
A sign-in link from signInUrl({ required }), or an OpenID Connect request, with a required entry made only of mailboxes | The mailbox page, then import |
A sign-in link whose connectors names a single app | Trust, then that app, marked Required, after the mailbox page if a mailbox the app does not meet is also required. See Require one thing, or link to one app |
A sign-in link whose connectors names only sheets | The older connect page: phone number and code, then Sheets. That page does not read required |
| The ChatGPT or Claude app store listing | That listing's own connection page |
A connect link minted for one app opens on that app ("Connect Gmail"), with no assistant cards. A person new to Configure sees the trust screen before it, and enters their phone number and code after it. profile.connect({ app }) mints this link. So does configure_connect with an app, once the person has signed in.
For a person who is already signed in, a connect link that names no app opens on the list of apps. A connect link that asks for a capability, such as gmail:send, keeps its own page. A person who is not signed in enters their phone number first.
When the mailbox page comes first
The mailbox page asks for Gmail or Outlook before anything else. It reads "Connect your apps and assistants to" followed by your app's name, then "First, connect Gmail or Outlook to secure your account." It has a Continue with Gmail and a Continue with Outlook button and no Continue button. Below them, a line says what comes next, such as "Then bring your ChatGPT, Claude, Gemini or Grok memories into" your app.
The person continues by connecting one mailbox. The import screen follows with that mailbox already connected, then the phone number and the code. On a link for one app, that app's screen follows instead.
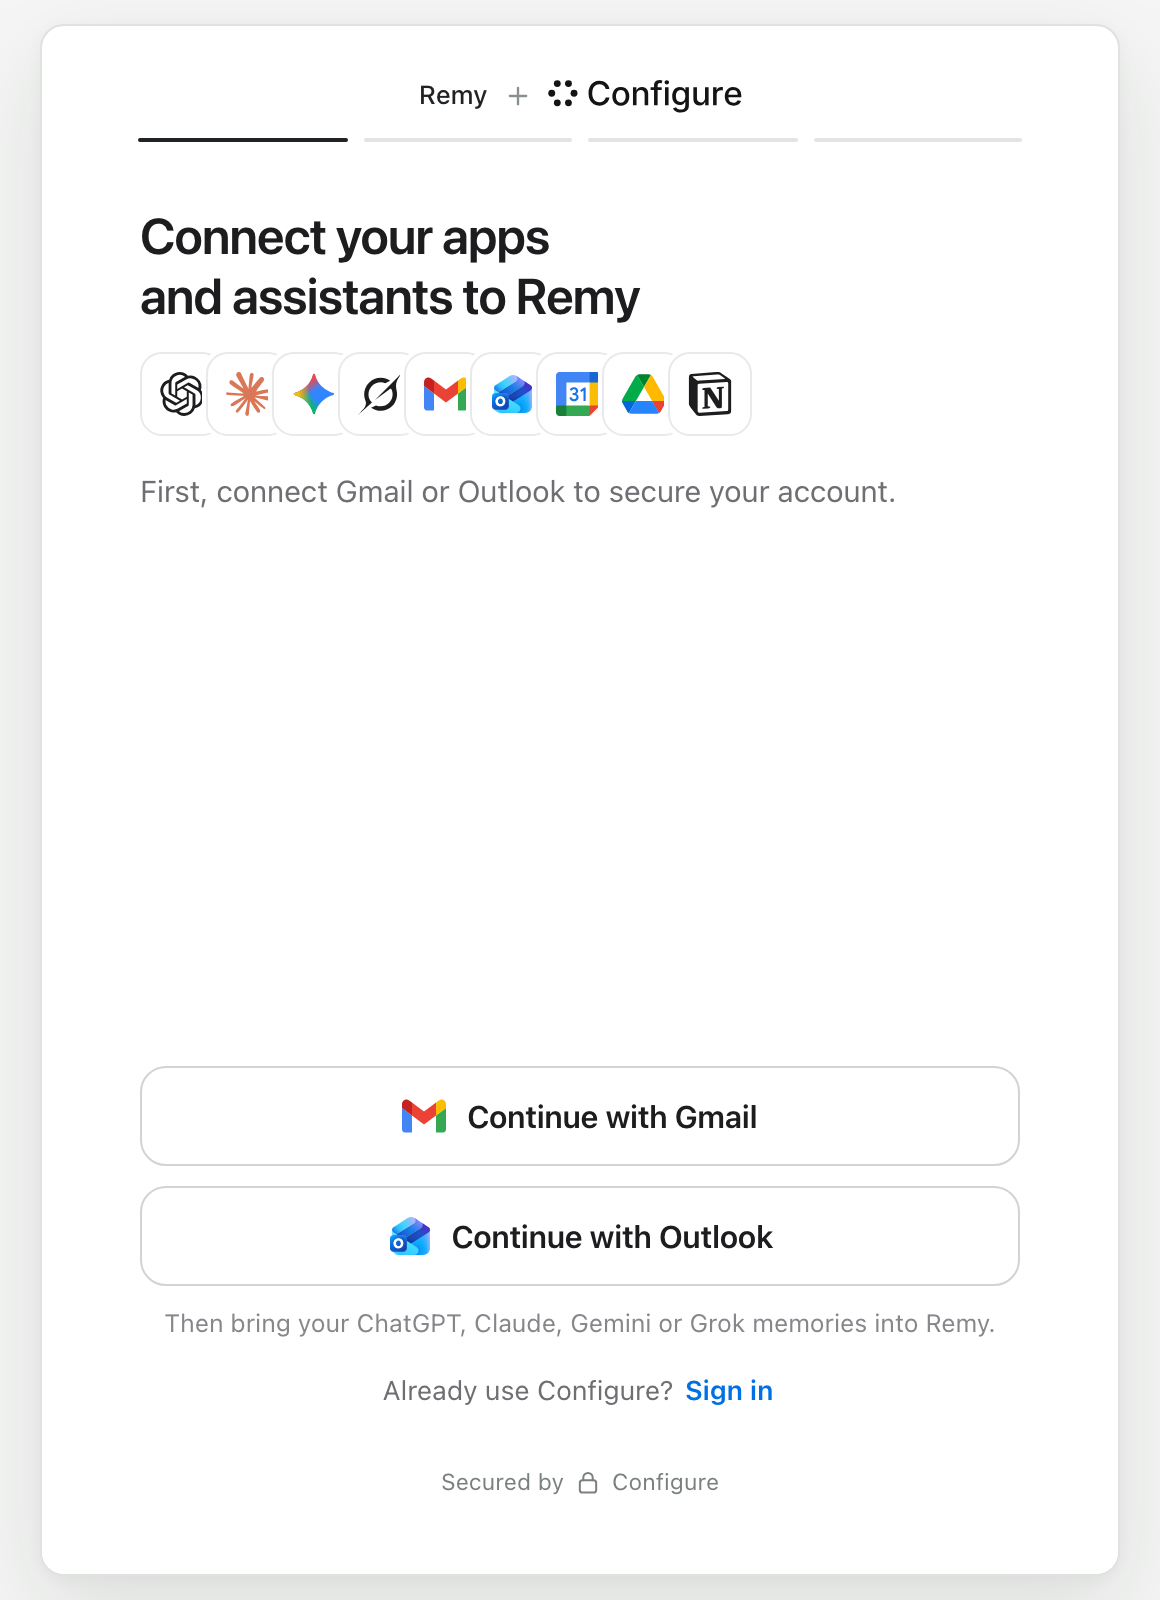
It comes first when a sign-in asks for a mailbox before anything else: a required entry made only of mailboxes (email, gmail|outlook, gmail or outlook). You can send required two ways: on a sign-in link from signInUrl, or on an OpenID Connect /oauth/authorize request. A reading app that sends required=gmail|outlook either way shows its readers this page first:
ts
const url = configure.auth.signInUrl({ returnTo: "https://yourapp.com/callback", state, required: ["gmail|outlook"] });Connect links from profile.connect() and configure_connect do not take required, so they never open on this page.
When the entry names one mailbox, the page offers only that one. Any other entries apply on the import screen that follows. When the link is for one app, and that app is a mailbox the entry accepts, the link's own screen asks for it instead. For example, connectors: ["gmail"] with required: ["email"] opens on "Connect Gmail".
It does not come first in these cases:
- The
emailscope on its own. An OpenID Connect client that asks for theemailscope gets the import screen first. After the code, if the account has no verified email yet, the mailbox page follows. To put the mailbox page first, addrequired=emailto your authorize request. OpenID Connect has the whole request. - Configure's own profile sign-up. It opens on the import screen too, and asks for a mailbox after the code when the account has none connected.
When your product needs a verified email address, require a mailbox. Otherwise, leave it out. The person can still connect Gmail or Outlook on the import screen. When you need the address and not the mail, also send mailbox_access=no on the authorize request: a person who signs in with Google but keeps their mail private still meets the requirement. OpenID Connect has the line.
Require apps and assistants
If your product needs something the person has not brought in yet, name it in required. Continue stays off until every entry is met. On a sign-in link, pass it to configure.auth.signInUrl({ required }). On an OpenID Connect sign-in, pass it as one more parameter on your /oauth/authorize request. Everything else about an OpenID Connect sign-in is standard OpenID Connect, as OpenID Connect shows: your server posts the code to /oauth/token and verifies the ID token with a library such as jose. The SDK's auth.exchangeSignInCode() belongs to a different sign-in and does not apply. Commas separate entries, and the | is URL-encoded as %7C:
text
GET https://api.configure.dev/oauth/authorize?response_type=code&client_id=oc_...&redirect_uri=...&scope=openid%20email%20profile&state=...&nonce=...&code_challenge=...&code_challenge_method=S256&required=gmail%7Coutlook,chatgptWhen the person is back, check email_verified in the ID token, and read the imports section of their context to see that ChatGPT came in.
The grammar:
- Every entry must be met. The example needs a mailbox and ChatGPT.
|inside an entry means any one of them."gmail|outlook"is met by either.emailis short forgmail|outlook.- In a URL, commas separate entries:
required=gmail|outlook,chatgpt. POST /v1/profile/connect,configure_connect,createMessageSignInUrlandConfigure.signInWithPopupdo not takerequired. They drop it without an error.
Valid names are chatgpt, claude, gemini, grok, gmail, outlook, calendar, drive and notion, plus email.
Each required entry moves to the top of its list and reads Required in red until it is met. When an entry has alternatives, each one is marked. The line above Continue says one is enough, for example "Connect Gmail or Outlook to continue."
On a sign-in link or an OpenID Connect request, an entry made only of mailboxes gets the mailbox page instead. So the example opens on the mailbox page, then the import screen with ChatGPT marked Required.
Require one thing, or link to one app
These are two different requests. They give two different screens.
- Require one thing and leave the rest open. Name it in
required, for examplerequired: ["notion"]. The import screen still offers every assistant and app. Notion moves to the top, marked Required, and the person can add anything else too. - A link for one app only. Pass
connectorswith a single app, for exampleconnectors: ["notion"]. The person sees that app's screen, marked Required, with anything else you require beside it. Use this when connecting that app is the whole point of the link. If a mailbox is also required, the mailbox page comes first and then points to Notion, unless the person already has it.
On a sign-in link, connectors takes gmail, calendar, drive, notion and sheets. The SDK's type also accepts outlook, but the hosted page drops it without an error, so a link with connectors: ["outlook"] is a plain sign-in. To ask for Outlook, require it instead: required: ["outlook"]. The import screen does not show Sheets, so a Sheets link opens the older connect page instead. That page asks for the phone number and code first, then Sheets. It does not read required, so nothing is marked Required and Continue is not held.
connectors with two or more apps is not a one-app link. The page stays a sign-in that offers those apps.
A name Configure does not know
An OpenID Connect request is not checked. The hosted page drops a name it does not know. What is left of the entry still applies. An entry with nothing left no longer holds Continue. So a typo such as gmial silently removes the requirement, and the person reaches your app without a mailbox.
required shapes the screen. It is not a security control. When the person is back, read their context on your server and check what it holds. configure is the client from the Quickstart. After a sign-in, the read is configure.profile({ token }).read(). For your own user id, it is configure.profile({ externalId }).read().
If you already send people here
You do not need to deploy anything for the ways in above. Configure sets the order, so the links you already send follow the table above. What reaches your app when the person finishes is unchanged. The receipt comes first, then the same return as before.
Check two differences:
- A new person must bring something in. Continue stays off until they import from one assistant or connect one app. Someone who already has an account taps Sign in instead.
- A sign-in no longer offers a mailbox after the code. If you counted on the person connecting Gmail or Outlook, sign them in over OpenID Connect with the
emailscope. Or addrequired=emailthere to ask for the mailbox first.
The app store pages
When someone connects Configure from the ChatGPT or Claude app store listing, they see that listing's own connection page. It keeps its own screens and does not follow the order on this page.